You will submit (hand in) most of your computer work using an online drop box. You should always submit a copy of your work and not the original. This way, you will be able to resubmit your work in case there is a problem.
Note that the examples below may not be 100% accurate for your school. There are variations across the province that affect how you may be required to hand in your work. Though the basics will be similar, not all drives have the same name or drive letter. Check with your teacher if you have problems.
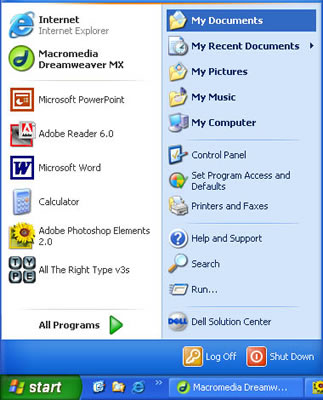
 Step #1 - My Documents Step #1 - My Documents
To get your work ready to be handed in, you should check to see that it is correctly named and organized.
To do this, select My Documents from the Start Menu. |
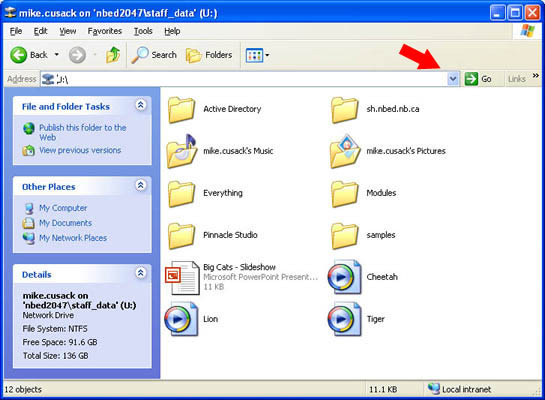
The My Documents button will take you to the My Documents folder.
From here, click on the Blue Drop down Tab in the Address Bar. It's next to the green Go arrow.
Note: You may already be in your User Drive or in another folder. You should still do this step to be sure. |
Step #2 - The User Drive

Select the User Drive. It should have your User Name on it as well. |
Step #3 - Folders
Depending on what you are handing in you might need to create a folder. Here is how to do that. If you only need to hand in one file, you won't need to follow this step.
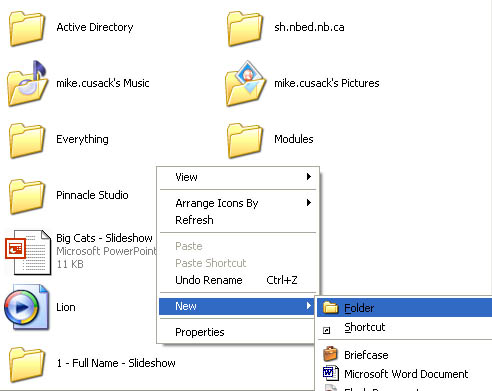
Right Click on a blank part of the window (the white space). Select New and Folder.
You will then be shown a new folder named New Folder. You can retype the desired name for the folder overtop of this name. |
  
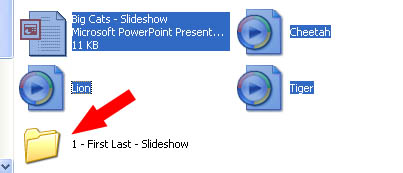
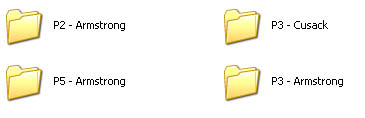
Name your Folder like this... Period Number - FirstName LastName - Project Information
For instance, Susan Coates in period 1 would make her folder look like the folder shown here.
Note: Two other ways to rename a file or folder are to click on the file/folder and hit the F2 key on the keyboard or right click on the file, select Rename and then enter the desired name. |
Step #4 - Moving Files
Select the files you need to put into your folder. Then drag them into the folder.
You can select them in a number of ways.
1) Click and drag individual files.
2) Click and drag a box around multiple files.
3) Hold down the Control (Ctrl) key on your keyboard and click on the files you would like to select.
4) Right click on the file you want to move, select cut, then paste the file into the folder.
Then drag the selected files into your folder.
Note: Your files may be in more than one location. Pictures are commonly found in the My Pictures folder. Clicking the Folders button (near the top middle of the window) can be helpful to move from one folder to another. |
Step #5 - Double Check
Once you have your files in your new folder, you should open the folder and check to be sure that the files work the way you expect them to.
In general, things will work how you expected them to, but sounds in PowerPoint and pictures in Dreamweaver can be more tricky. If your files don't work correctly, you might try the following...
In PowerPoint - In your slide show, delete the original sound and reinsert it from the new location.
In Dreamweaver - Reset the target (Source) for the file. In either case, you will likely have to resubmit the entire project (see In Conclusion below). |
Step #6 - Copy and Paste
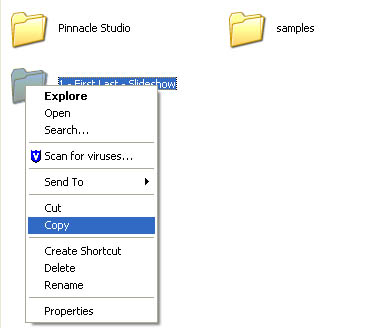
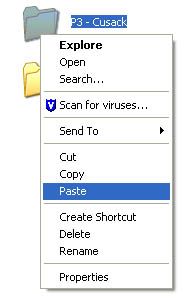
Right click on your folder (or file) and select Copy.
Important: Don't select Cut. If you do and some mishap takes place, the teacher will have no way of finding (and marking) your work. By sending a copy, you will have proof that you've done your work. |
Step #7 - The (Student) Share Drive
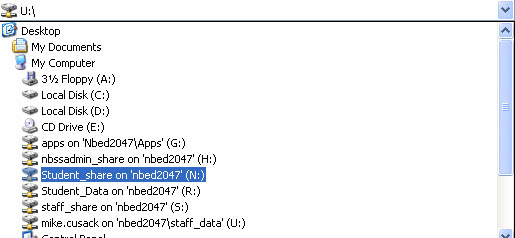
Using the same blue drop down arrow you used in step #2, find the Student_Share drive. |
Step #8 - The Drop Box
Double click on the folder you would like to put your work in. Here we will use the grade 9 box as an example. |
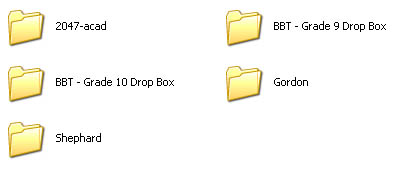
You many them see a number of sub folders. Each of these may represent a specific class, subject, grade or period. |
 Right click on the folder into which you'd like to paste. Then select paste from the dialogue box. |
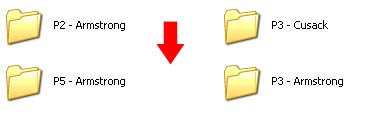
Note: Depending on what files you are submitting, you may get an error, specifically regarding a file called thumbs.db. If this happens, paste your work into the main window (not overtop of the sub folder), such as the white space indicated by the arrow. |
In Conclusion
Resubmitting Work: If you need to resubmit your work, add a number to the end of the folder name. For instance, if you made some changes to your work and want to hand in an updated version, you might change the file name from "3-SusanCoates-photos" to "3-SusanCoates-photos2". The folder with the higher number at the end will be the one considered for marking purposes.
If the files you are submitting are big enough, you will see a box appear telling you how much longer it will take to send them. If your files are very small, this box will not appear. As such, you will only receive confirmation your files have successfully been handed in from your teacher. |